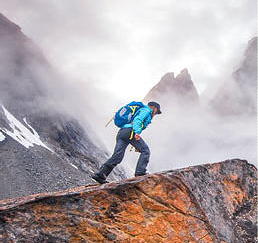
Zounds, you've crafted quite a question. I'll give it a go and others will doubtless chime in.
95% of my processing is done in Lightroom 4. Import settings can handle common edits specific to the camera, saving gobs of time. My cameras auto-rotate in camera, so I don't have to do that (well I have one camera that doesn't and I curse it every time I use it).
Lightroom edits are non-destructive, in that they append edits to the image in a separate "sidecar" file, so I can go nuts and if I don't like the results I can sweep the edits aside and start fresh. Adobe camera raw replicates most of the Lightroom editing suite and can even edit jpegs, so you don't have to shoot RAW to use it.
Importantly, Lighroom is also a data base that imports, tags and tracks your photo collection--it can also duplicate them to a safe external drive on import and likewise, will export photos using your chosen presets (such as renaming and altering image dimensions and file size).
Storage is cheap now so I only delete my failures--never know when I might want that boring shot. This, of course, is a very personal decision. I shoot many thousands of frames per year so don't have time or the patience to pore over them with great levels of concern about worthiness.
File size: understand that your jpegs are compressed by the camera and "plump up" a good deal when you open them in Photoshop or other editing program. Do not further compress your images when you save them, or you'll degrade them in the process. If your camera records RAW, shoot with that and then compress at a time you want to post or share a jpeg.
Haze has many sources. Atmospheric haze can sometimes be reduced with a good quality haze or polarizing filter. Flare from the sun hitting the lens can be controlled with a lens hood (and keeping the lens scrupulously clean). Poor lens design has no cure that doesn't involve camera replacement. In post processing, levels, contrast and sharpening adjustments can sometimes help, but won't retrieve detail that's not there.
Happy experimenting!
I am interested in how you process your photos. I have Adobe 10 Elements and through trial and error settled on the method below. I am open to ALL ideas! There has got to be a better way.
1) rotate and crop the photo
2) adjust lighting first with "levels". I find this does less color distortion and a lot of my photos are simply overexposed.
3) then go to "shadows and highlights" - go straight here if snow in the photo to reduce the overexposure in the snow. I really limit what I do here, becuase it distorts color. If I darken highlights, I often have to go back and reduce saturation because the color looks too fake.
4) then go to "saturation". My husband swears that I see read more vividly than others- he may be right. I very often reduce the red. I also do not like fake looking sky - so may reduce saturation of cyan and blue. I may brighten the vegetation with a small increase in yellow saturation. I mostly use saturation for photos taken on cloudy days to bring out more color.
5) Then return to "levels" and fine tune.
6) If all tries fail, I delete the photo. A poor photo is a poor photo and may as well get rid of it.
7) If good, save under a different name (IMPORTANT!). Is there a quick way to know what size to use? I do not want to loose resolution but no need to save at 8 MB if the camera pixels only produce a 5MB photo.
I really need to learn to set my camera better before I take photos. BUT, between my old eyesight and sunlight on the display, I cannot read the menu to adjust! Very frustrating to me. I usually just set it on the generic scenery setting or auto.
Does anyone have a trick for reducing haze?


 Previous Topic
 Index
Index


