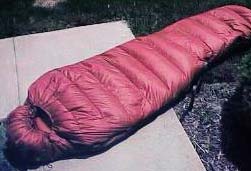
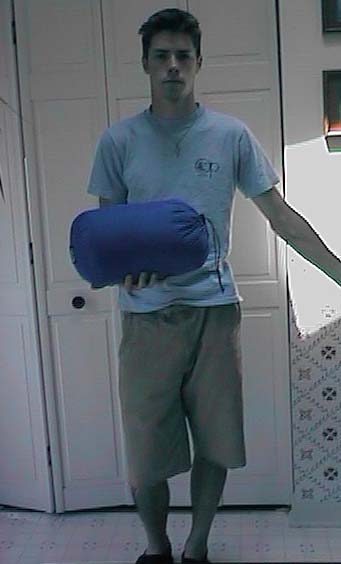
IntroductionA sub-2 lb. 3-season down bag for $90 ? Get outta here!!...Have you ever lain in bed at night thinking about the day when you'll be able to score a Feathered Friends or Western Mountaineering sleeping bag? Or toss and turn restlessly wondering how you'll be able to finance the down payment for one of them? Well I've got a solution that may help you sleep easier: Make your own bag! I've been making my own gear for a couple years now, and sleeping bags are one of my favorite things to make. When you think about it, there's nothing too complicated that prevents you from making one--they're basically a quilt sewn together at both sides. How hard is that!? Well, it's a little bit more complicated than that, but hopefully I'll be able to walk you through it with the plans for making your own down mummy bag. I'm convinced that these bags are lighter than the bigger retailers and cost almost three times less to make. My biggest surprise after making one of these bags is how similar it was to $250+ down bags I saw in the store...even the best quality FF and WM. The 20 degree model packs down to about 7"x14", and weighs approximately. 1lb. 15 oz. Not bad, eh?
|

|
MaterialsSleeping bags don't get a whole lot of stress in comparison to items like boots and tents. Therefore, constructing bags from the lightest material available is the best way to go to shave ounces (or pounds) off your pack weight while at the same time maintaining a high level of durability.I use 1.1oz ripstop nylon for both the inner and outer shell, and 700 fill power down for the fill. For colder weather bags, I use a half zipper, #5 YKK, and for summer bags I use a full length #3 YKK. Aside from a small piece of hook&loop (velcro), a drawstring, and no-see-um netting for the baffles, that's all you need to construct a bag. However, this stuff can be expensive. 700 fill power offers a great amount of loft, but is VERY hard to purchase retail. I had to order a minimum of 5lbs that ran me over $360! This is by far the most expensive part of the bag, but when you think about it, since it's a loftier down, you can use less of it--therefore, carrying and paying for less. Dimensions are up to you, but I go with the traditional 60"x54"x38". The hood is a simple design, but does the trick. Half zipper or full zipper...it's up to you! A draft tube to go along with it. I'll give instructions for my own stature (6 foot male, 155lbs) and you can modify however you want.
BafflesThe day I learned how to design baffles I felt like the enlightened Buddha! I'll explain how to go about it in the steps. The baffles for these bags are basically long rectangular strips of noseeum netting that acted as 'walls' to separate and keep the down in individualized compartments. You can design em anyway you want, but lately I've been working with continuous straight-block baffles, that is, the down can be shifted from top to bottom or vise-versa without interruption, and they run perpendicular to the fabric (as opposed to slant-box baffles, which are off-set and set at angles). For lightweight summer bags, baffles are not commonly used, which makes construction easier. I'll try to give instructions for both types. Remember also that the temperature rating for a bag is based on how much loft the bag has. A summer bag typically has about 3" of loft (1.5" top, 1.5" bottom), and 20 degree bags about 6" (3"top, 3" bottom). Therefore, I usually make the baffles about 3.5" in height, and the length about 60" (or shorter, depending how close you get to the foot section of the bag).Notes: You gotta have a sewing machine to do this (obviously). Thread type doesn't matter too much, but make sure it's not too thick. You want to use the smallest needle possible so you don't make big holes (facilitates down leakage), and i also use a low-thread count (8-10per inch) for the same reason. I've been sewing for a couple years, so I know how to do a lot of seams and stitches that makes for a nicer looking and higher quality bag. They are hard to explain, so I'm not going to try. A background in sewing helps...I don't know the names for the stitches, so I'll just try to give you the best idea I can. The best thing you can do when making a bag is use an existing bag to model from, so you'll get an idea of what I'm *trying to explain.
|
The StepsStart out by making a newspaper cutout pattern. Construct it in the traditional mummy fashion, but make it so it represents one side of the mummy bag, like your looking at a bag from a bird's eye view. The cutouts should be identical, except that one will have a semi-circular extension at the top (the hood). Be sure to allow yourself more material than you think you will need to allow for seams..it's better to have a bag that's too big rather than too small.The sheet of material should measure 60" in width by 2.5 yards (7.5 feet). Note: make sure after cutting out the patterns from the material, to run the edges over a candle flame so they don't fray (if you didn't use a hot knife). Most material is 60" in width. This should give you enough room to get the tops and bottoms of the bag, if you invert both patterns. Typical dimensions are 59-62" shoulder girth, 52-56" hip girth, 39-40" foot circumference. The shell is constructed of 4 parts: the inside and outside TOP part, and the inside and outside BOTTOM part. The bottom part is longer, since there is an approximate. 16" diameter semicircle as part of the pattern which is to be the hood. The top (near the chin area), can be cut straight across or with a slight (apr ox 6") concavity. Once the patterns are cut, sew the two patterns that look DIFFERENT along the sides. In other words, the outside shells are sewn together along the sides, as well as the inside shells. Still confused? The longer pattern with the hood is sewn to the shorter pattern along the side. Sew with about a 1/2" seam allowance, and invert so the seam is hidden. After that, cut the baffles. No-see-um netting is the best. Temp rating is determined by loft of both the TOP AND BOTTOM part of the bag. Typically, a 20degree bag has about 6" of loft, so if you laid the bag out like a quilt (open), the loft would be 3". So make the baffles as high as you need. For 20degree bags, cut baffles about 3 1/2" (the final baffle will be about 3" high). Since shoulder girth is typically around 60", this is as long as the shoulder baffle needs to be for that area, since these instructions are for CONTINUOUS baffled bags. As you move farther down the bag, baffles decrease in length. It gets crowded in there when you start sewing the baffles, so it helps to draw parallel lines on the INSIDE of the shells to determine where the baffle needs to be sewn. Baffle width is usually 5 1/2"-6 1/2", so measure up from the bottom and draw parallel lines across spaced about this distance from each other. Remember, you are drawing these lines only on the inside, and they go straight across both the HOODED and NONHOODED pattern, WHICH ARE SEWN TOGETHER. It's hard to visualize, I Know. Before you start sewing the baffles in place, place the two patterns together so they are identical. Remember, there are only TWO patterns now, since they are composed of two separate parts for each pattern. Place them together so the INSIDE of the shells (where you drew the lines) are on the outside of the bag, where you can see them. Sew with a 1/2" seam allowance along the top of the pattern; in other words, along where your chin would be, and where the circumference of the hood semi-circle is. Do this as you did the side seam, and invert in order to hide the seam. Then once the lines you drew are now on the INSIDE, sew the two pieces together about 1/2" from the seam you just made. You will be able to see the stitching on this part. This is to contain the drawcord. Next, sew the baffle strips along the lines you drew, on only one Pattern. It helps to tuck over a small allowance so you can sew through TWO parts of the no-see-um as opposed to one, for added strength. This next step is very important. You MUST start at the very TOP of the bag, the first baffle in the hood section. It is very hard to describe in words, but this is the only way to do it. Sew the other side of the baffle to the other side of the shell, which has lines on it, but has not been sewn yet. You have to stuff the down in this first (and the second) compartment first, before sewing other baffles, or you won't be able to get it in there. Repeat for the second compartment. Now you can sew all other baffles and save the filling for later. Do one baffle strip at a time, sewn to each drawn line, and work your way down to the foot of the bag. Now sew the bottom of the bag together so the down won't spill out when you stuff it. Sew parallel to the drawn lines and tuck the ends in so they won't fray. Next, sew a zipper on one side of the bag, again tucking in the fabric so it doesn't fray. Then hand fill the chambers with down on the open end, and sew the other zipper to seal the chambers. Making a square foot box is the easiest way to go about this task. If the bottom length of the bag is say 40", make the square pocket 5"x15", or 6"x14", so that the perimeter of the box is also 40". Sew the box on three sides, with tucked seams, and seal the fourth side after filling. Then sew the foot box to the bottom of the bag along the perimeter of the bottom. Insert a drawcord and stitch each side to keep it in place. Cut two small holes and have the cord come out near the side seam, insert a barrel lock, and since up the hood. You can do a velcro closure near the top of the zipper if you feel like it. Remember not to forget zipper stops.
|

|
* The best thing to do when making a bag is to have one available to use as a model. A lot of the things I was describing are hard to visualize without seeing them. My first sleeping bag was pretty crude, but worked well. Good luck!
|
Return to: [ Top of This Page ] [ Make Your Own Gear Page ]