
| 21. |
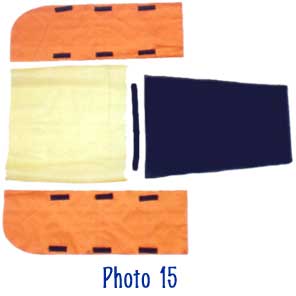
Cut the front panel components according
to figure 13. A layout of it together with the side components is shown
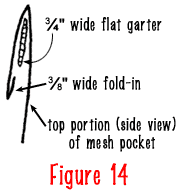
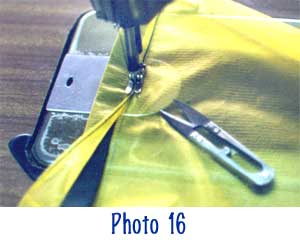
in photo 15. Start construction by sewing the flat garter at top end of
no-see-um mesh as shown in figure 14 and photo 16. Note: the garter is
intentionally cut shorter than the top edge of the mesh such that when
you sew the mesh assembly onto the front panel, it acts as an elasticized
closure system.
|
|

|
||
|
||
|
||
 |
||
| 22. |
Sew (front) mesh assembly onto front
panel starting at the sides. Since the bottom edge of the mesh exceeds
the bottom edge of the front panel (in terms of width), you have to make
two pleats at the mesh end before sewing it shut to the latter. Then sew
the (long violet) 3/4" wide strap that connects with the SR buckle of the
lid at the bottom center edge of the assembly. Option: You may want to
add some accessory loops to the bottom edge of the previous assembly before
sewing it to the bottom panel. I personally used 3 1/2" x 5/8" grosgrain
ribbon for the pink loops you see in photo 21 that holds the yellow bungee
cord down the front panel.
|
|
 |
||

assembly