Starting on my quest Bilgy tent
Posted by: james__12345
Starting on my quest Bilgy tent - 05/08/11 09:20 PM
Posted by: finallyME
Re: Starting on my quest Bilgy tent - 05/09/11 12:55 PM
Looks great. It even gave me an idea. Thanks.
Posted by: james__12345
Re: Starting on my quest Bilgy tent - 05/09/11 02:12 PM
I'm not sure what idea it could have gave other than boxing out the bottom, but I'm glad it helped. I can't take credit for it though, I just followed the instructions that came with the kit.
Posted by: Kent W
Re: Starting on my quest Bilgy tent - 05/16/11 09:50 PM
I like the desighn of the Biglby, But I would make a beak on the front that could velcro shut in a bad storm. I think it couldbe done easily and wouldbe worth the time and maybe 2 ounces!
Posted by: james__12345
Re: Starting on my quest Bilgy tent - 05/16/11 10:46 PM
It has a a full flap over the front door. The velcro that holds the flap allows you to put it up, but leave a gap at the top of the tent for ventilation. I'm not sure what the beak would gain over that, except giving a little protection to gear in the overhangs on the sides. I am not familiar with these types of tents though, so if I'm missing anything about it, please point it out.
Posted by: james__12345
Re: Starting on my quest Bilgy tent - 06/16/11 06:51 PM
I figured out something very helpful recently. I was having some trouble keeping the pins in place along the long seams where I had to topstitch. I remembered something I saw my girlfriends grandma do with a quilt. She had used a single strand of thread and using a very very long stich tacked the material together before doing the real sewing. After sewing the single strands can then be pulled out. That method worked great for keeping the material tucked under it self to make the seam lay right. Tonight I will be doing that with the last seam between the floor and the tent side and then the tent will start going 3D finally

Posted by: OregonMouse
Re: Starting on my quest Bilgy tent - 06/16/11 06:59 PM
That is called basting, and it works!
Posted by: frenchie
Re: Starting on my quest Bilgy tent - 06/17/11 03:01 AM
And it works for any kind of stitching preparation! Just do it in the "excess" fabric or in the center of a french seam. The final coating (seamsealing) will fill all the needle holes.
Posted by: james__12345
Re: Starting on my quest Bilgy tent - 07/10/11 10:11 PM
Posted by: james__12345
Re: Starting on my quest Bilgy tent - 08/16/11 04:54 PM
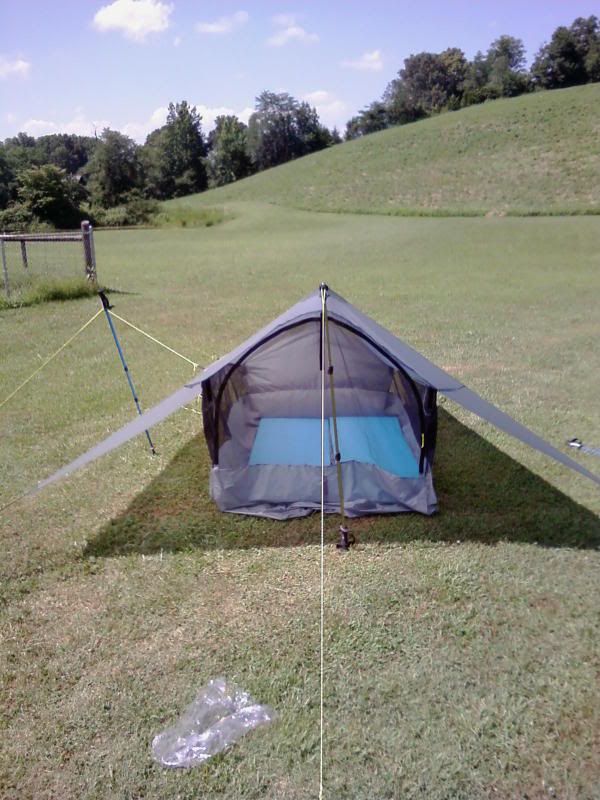
Finally tried the tent out last night. I set it up a while back in the yard, and put the sleeping pads in it. My thermarest didnt slide too bad, but my blue pad slid awful. Because of that I had put a few stripes of the silicone I sealed it with on the inside of the floor for grip. I discovered last night that the same thing is needed on the OUTSIDE of the floor to prevent sliding on the tyvek ground sheet. On even the smallest incline, the entire floor would try to slide away. I had to set up in about four different locations to finally find a spot flat enough. Thats really the only complaint I have with the tent so far. Something else I found out is that the tensioners I put on the lines for the side pulls need to be a lighter elastic cord. The cord I used for the end pulls seems to be just right though.
Posted by: finallyME
Re: Starting on my quest Bilgy tent - 08/19/11 11:37 AM
It looks really good james. Have you put it under the hose yet to test for waterproofness? Hmm, maybe I should read the whole thread instead of just looking at the cool pictures at the end.
Posted by: james__12345
Re: Starting on my quest Bilgy tent - 08/21/11 04:52 AM
Thanks. No, I haven't hose tested it yet. That will be coming in the next few days. At the peak of the footwall there is a spot in the roof where the two rows of stitching didnt line up quite right. Because of that, the tension has opened a couple of very small holes in that seam. I need to sew a small reinforcement patch over that area to prevent those small tears from spreading and seal the seams on the patch first. After I get that done, and those stripes of sealer on the outside of the floor then I will take the hose to it.
Posted by: Wolfman
Re: Starting on my quest Bilgy tent - 08/28/11 10:05 PM
Very Nice james__12345! I have been thinking about making this same tent/shelter. I have a few questions if you don't mind.
1) What did you use for fabric?
2) The side lifters don't seem to lift much, it that the design or are they to pull on the material if it gets wet? I guess I am wondering what they do?
3) Is the sliding a issue of the fabric or design? I am asking you opinion on this.
4) I am not sure how you sealed the seams, or if you did, but I would like to know about that. I live in the PNW (Pacific North West) and it likes to rain a lot around here.
5) Finaly, what is the over all size of the shelter, both inside and out? I am a big guy and was thinking I may have to extend it some.
Thanks for any help.
Wolfman
Oh yea, how hard was it to complete?
Posted by: james__12345
Re: Starting on my quest Bilgy tent - 08/29/11 10:27 PM
It is made out of 1.1 ounce silnylon, noseeum netting, and gossgrain webbing. All the fabric is included with the kit, including the patterns and everything you need, except the obvious sewing tools. They give a list of the things they kit does not include (scissors, sewing machine, pins, sharpie and chalk to mark with, etc.), but the one thing they do not include that they dont tell you they dont include, is the grommet setter.
The side lifters dont do a whole lot, but they do raise the sides a good bit to make a little more room for when there are two people in the tent. They do more than it looks like they do in the pictures. They would also help prevent swag from moisture. The lifters done this way are from the first generation of the tent. The second generation (the one they are currently selling) only has one lifter per side, and it just ties out on a line, with out the extra poles. I like this design better so I contacted quest and got the info for this design of lifters instead of the single lifter per side.
The sliding issue is just the material, no matter what the design this material is SLICK. I did see a tent being discussed on here somewhere with a design similar, where the floor had stakes directly attached to the corners that I assume are to prevent such a problem. I dont expect it to be a problem with the new silicone on the outside, but I'll be sure to post on here the results after I test it again.
As far as sealing the seams, that is explained in the instructions. It is pretty simple though. A tube of 100% silicone (like you use around a bathtub or whatever), and some paint thinner (I used mineral spirits). Both of those are available at Lowes, Walmart, etc. You mix a little silicone in the paint thinner, then brush it on. That same mix is also what you use for the stripes inside and out on the bottom to keep the floor from sliding, and your sleeping pads from sliding on the inside. The instructions include a list of the trails the tent was used on during the design and testing process, and the pct is listed. Since you saying you're from the pacific northwest, I thought that might be of interest to you.
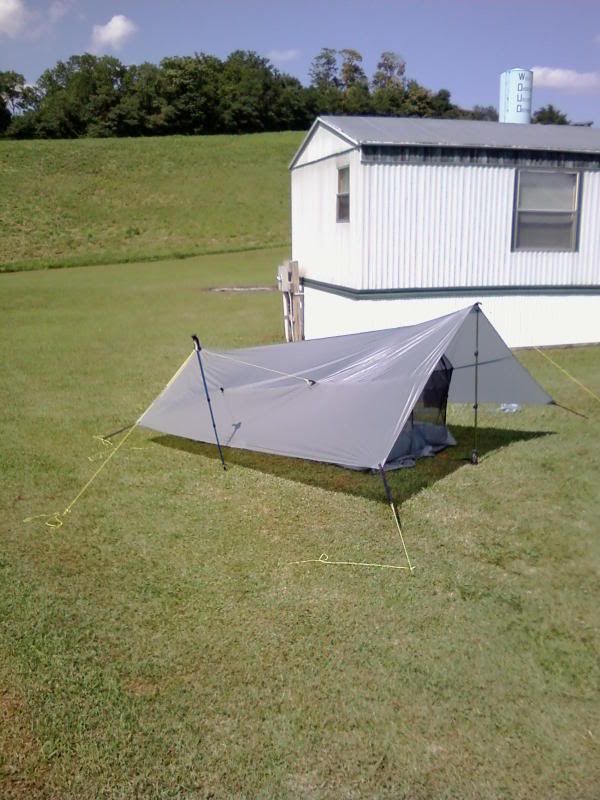
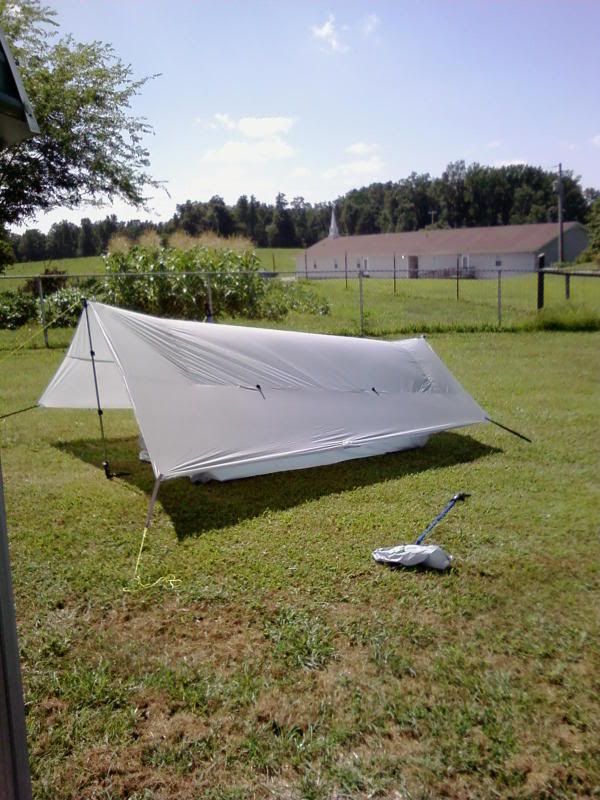
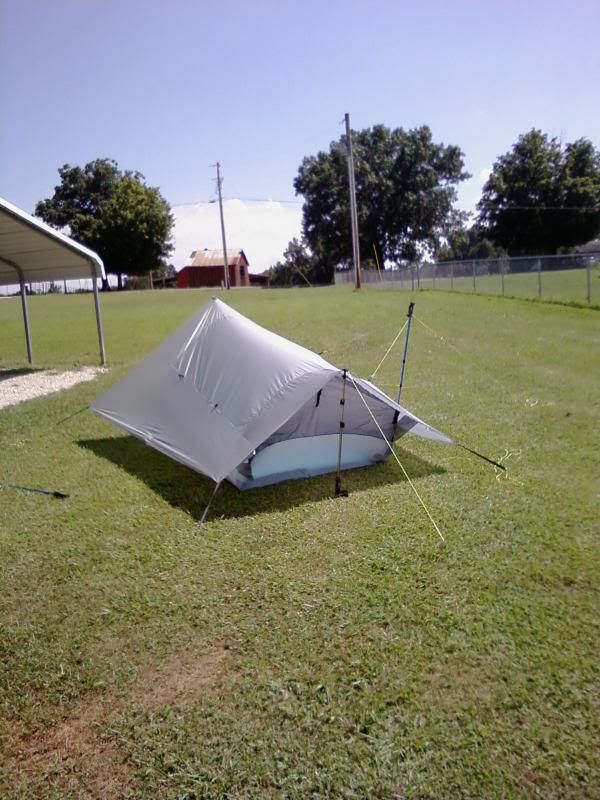
This is the two person tent, not sure if I ever stated that in the post so far, so just thought I'd point that out. As far as the size inside its pretty long, so I dont see being tall being a problem. They say 59in by 92in usable floor size in the instructions. Overall size is 121in long, 108in wide at the door end, and 72in wide at the foot end. The standard height is 39in at the door and 29in at the foot. To muddy all that up a little, the height and floor size vary a bit based of how high you set it up. If you check their site (I'll include these same pics soon) you will see that it can be set up higher for better air flow, or lower for better blowing rain protection. The higher you set it up, the less floor space you have, the lower you set it up the more floor space you have.
Adding to it would not be very easy to do. The floor is based off using the FULL width of the material. Because of that, and the overall design adding to it would be very tricky, and require a LOT of math, and I think quite a lot more sewing experience than just the tent as it is designed.
The answer to the previous question sorta leads into the answer for your last question.... I wouldn't say its really hard, more just very time consuming, but I would definatly not attempt it for your first sewing project. There is alot of talk about the slick silinylon material being super hard to work with, but honestly I didn't find it to be THAT much harder to work with than regular material. I've heard having a good machine makes alot of difference in that, and ours is pretty new so I'd say that helped. The instructions are very clear, so with a little basic sewing experience, its not too bad. The trickiest part of using this material, is that I had to be sure to keep the speed down. Sewing full speed made the material not feed properly and made it bunch up under the foot. As long as I sewed slowly, I didn't have any trouble. Most importantly, make sure you read through the directions before you start and take your time to be sure you understand what you're doing. I think the hardest part is keeping everything square as you cut the parts out. I HIGHLY recomend starting sewing with the stuff sack like they suggest. It gives you a feel for working with the material, on something that it doesn't hurt to mess up (you have enough extra material to replace it if you need to). Also be very sure you follow their layout on cutting out the pieces, because while there's enough extra for a redo on the stuff sack, there's not a LOT of extra included (atleast not with my kit). Long story short, work slow, and follow the directions carefully and its not that hard if you're a little familar with sewing in general in my opinion.
If you have any other questions feel free to ask.
Posted by: CamperMom
Re: Starting on my quest Bilgy tent - 08/30/11 07:40 AM
This tent looks beautiful!
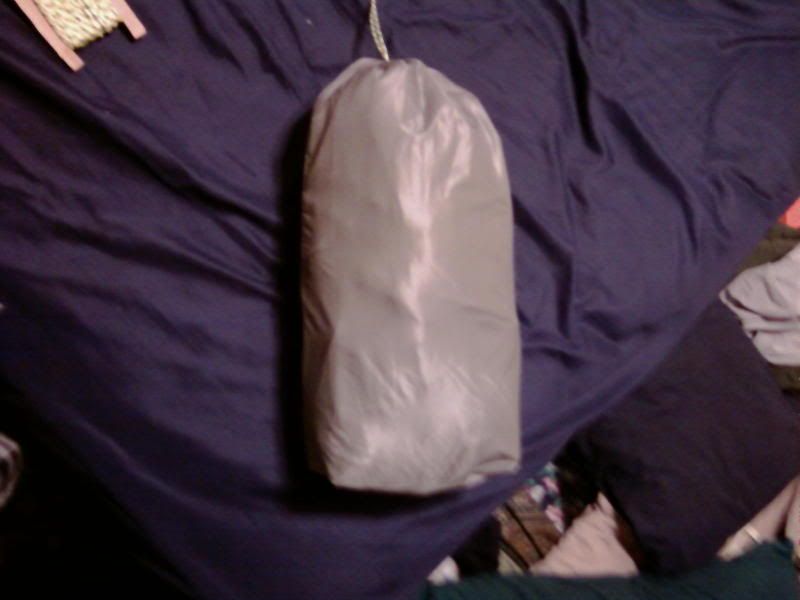
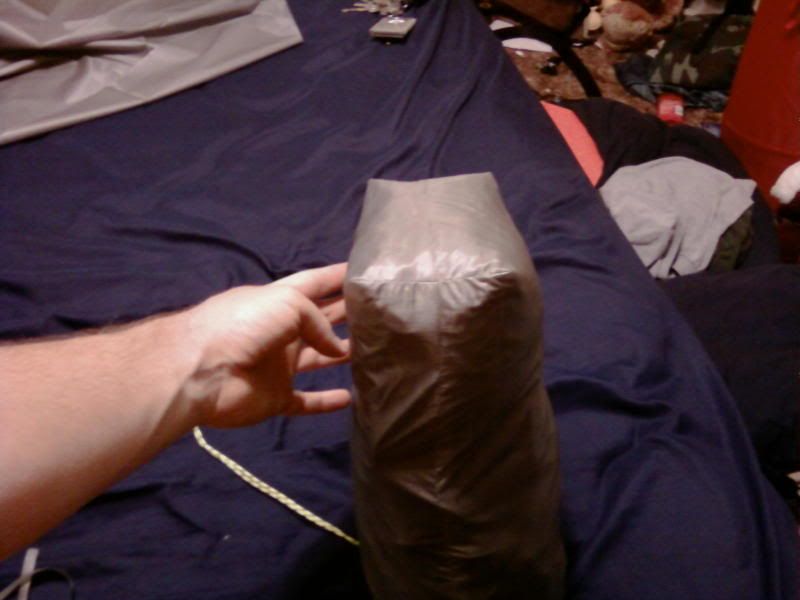
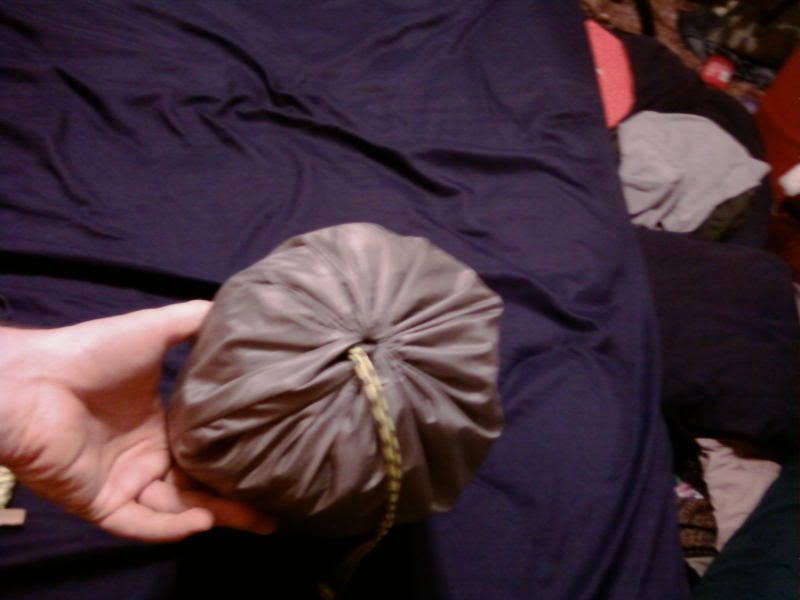
Have you weighed the completed tent and measured the packed size?
CM
Posted by: james__12345
Re: Starting on my quest Bilgy tent - 08/30/11 05:03 PM
No, I haven't weighed it (I dont have scales). The plans say 2 pounds 2 ounces (actually it says 2 lbs 4 oz, with 2 oz of stakes).
Mine is probably a touch over that because I went with the two side lifters on each side, so a bit more gossgrain and a bit more guy line. I also added self tensioners to the lines. Basically they're a loop of small bungee tied into the line to take up any slack that forms from overnight stretching of the tent, if anyone is interested I can show how I did it (I copied an idea from hammockforums). I also do not know if the stated weight includes the silicone for the seam sealing. You could shave a bit of weight off with a few simple design changes. There is a pocket on each side by the door (made of noseeum) and a "clothes line" down each side on the inside of the tent that could be done away with for the gram savers out there. I dont see being able to hang much more than a pair of socks on the line with out causing quite a bit of sag though unless you're using the side lifters.
The packed size is 15 high and roughly 7 by 3.5 if compacted down pretty tight.
One more thing I meant to mention to Wolfman and anyone else interested in making this tent, my biggest fault with the design is the tarbuck hitch it suggests on the end of the guylines. I could only get it right one time out of probably twenty attempts. Instead, I use a sliding grip hitch
http://www.Layhands.com/Knots/Knots_Hitches.htm#AdjustableGripHitch . I have had MUCH better success with that knot.
Posted by: Wolfman
Re: Starting on my quest Bilgy tent - 09/02/11 01:10 AM
Wow James Great answers!
I guess size is not a issue, given that it's 92" long. I'm 6'6" and my bag is 84" (i think) so that would be fine. I have seen the plan for sell before, but not the whole kit, is it OK to post where you got it from, or are their lots of places to get it?
Nice to know about the side pulls. I would probably use it mostly as a one person tent so the second set of poles for the sides would not work to well, but I like the idea of the bungee cord on those to add tension if the tent get wet and sags.
Thanks for the info, looks like I may have a winter project!
Wolfman
Posted by: james__12345
Re: Starting on my quest Bilgy tent - 09/02/11 08:30 AM
I got the kit from questoutfitters.com . As far as extra poles for the side lifters, there are other options there for that. You can always just use two sticks you find in the woods, or tie directly to a small tree up off the ground some. Also, like I said before, the new design intends for you to just tie the lifter out to a stake (further away than just the side pull) and that is supposed to help some. I'm about to head to work, but I'll go into more detail about the tensioners (with pictures) when I get home.
Posted by: CamperMom
Re: Starting on my quest Bilgy tent - 09/02/11 10:31 AM
Thanks for taking tiome to respond!
CM
Posted by: Kent W
Re: Starting on my quest Bilgy tent - 09/02/11 06:39 PM
James Looks good , If a small patch is needed with silnylon ya can glue a patch on with lightly thined silcone. Let the patch dry and sew perimiter. Seal with thined silicone.
Posted by: james__12345
Re: Starting on my quest Bilgy tent - 09/02/11 07:55 PM
Thanks for the suggestion. Thats how I had planned to do it, but after taking a better look at the seam, I realized it it wasn't going to spread any more, and the small holes were already full from the two or three coats of sealer I had put on it. I will check it out with the hose soon, and as long as there's no leak, I'll just leave it as it is I think.
Posted by: james__12345
Re: Starting on my quest Bilgy tent - 09/03/11 01:27 AM
I finally found the pics of the tensioners.
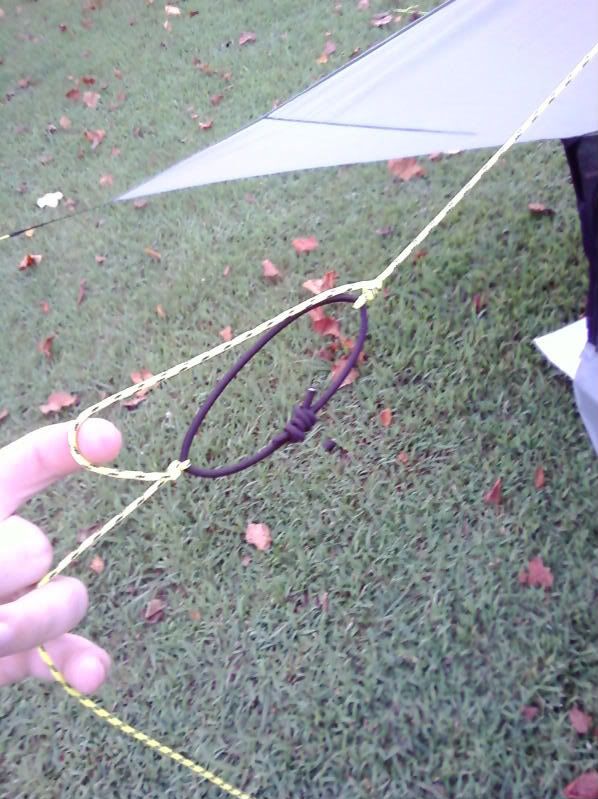
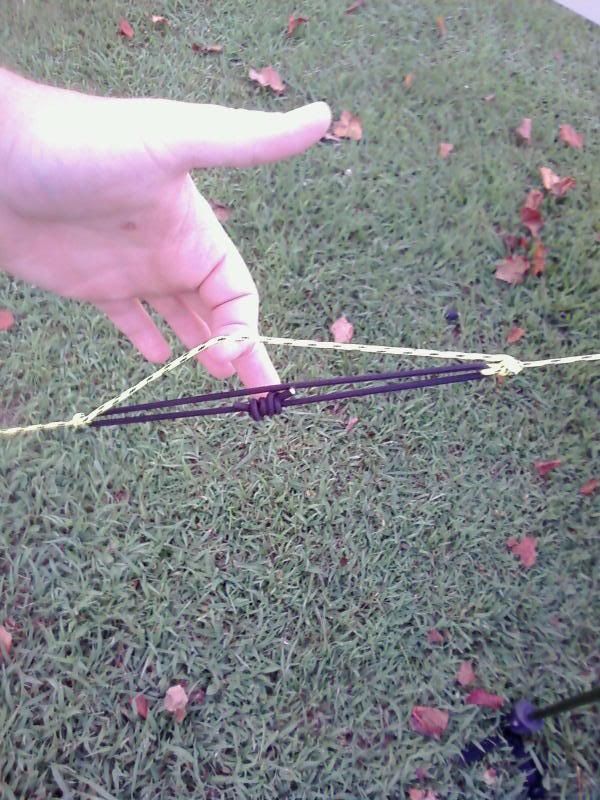
I used a 12 inch piece of cord, with a double fishermans knot on each end to make the loop.
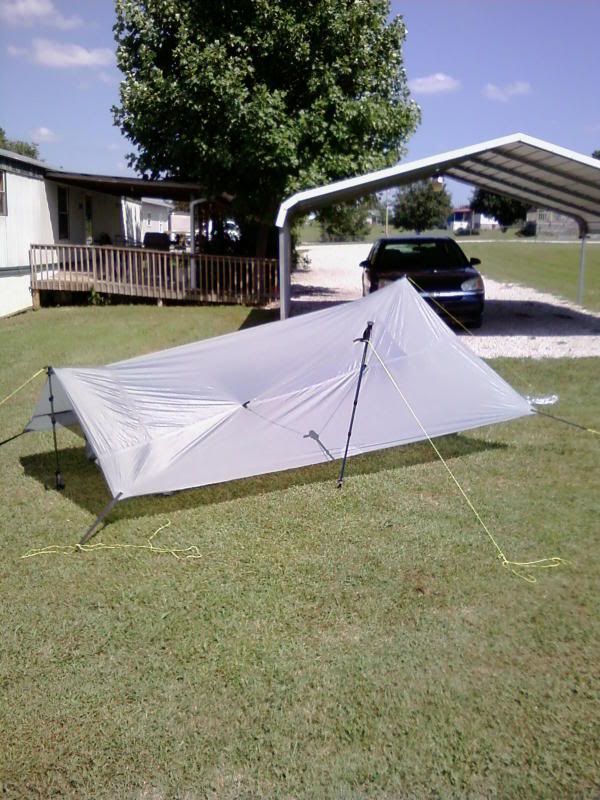
To attach it to the line, I tied an overhand loop, then ran the cord through before tying the double fishermans knots. I honestly cant remember what I tied to hold the line to the other end of the loop, so I'll have to look up what knot it is, but theres plenty of options that would work. You could just do another overhand loop once you figure out the length of line that you need. I have it set up where the line prevents the bungee from pulling quite to its max stretch, so that the line prevents it from being snapped. The length for that will depend on the bungee you use, so you'll have to play with that a little your self. Ideally you pull the line tight (loop stretched) as you pitch the tent, and as the material stretches overnight, you end up with something looking more like the unstretched picture that is shown here. I have figured out one thing about the tensionsers though, you dont need as strong a piece of bungee for the side pulls as for the corner pulls and ridge pulls. If they're the same (atleast with the bungee I used) you cant pull the side pulls anywhere near tight with out pulling the tent way out of line. I still need to find a smaller diameter (weaker) bungee for my side pulls.
Posted by: bmadau
Re: Starting on my quest Bilgy tent - 09/07/11 06:51 PM
That looks like it turned out really nice. Can you post some close up detail photos of how the side pullouts are sewn on, and maybe of how the netting is sewn to the top material?
Thanks,
BM
Posted by: james__12345
Re: Starting on my quest Bilgy tent - 09/08/11 12:38 AM
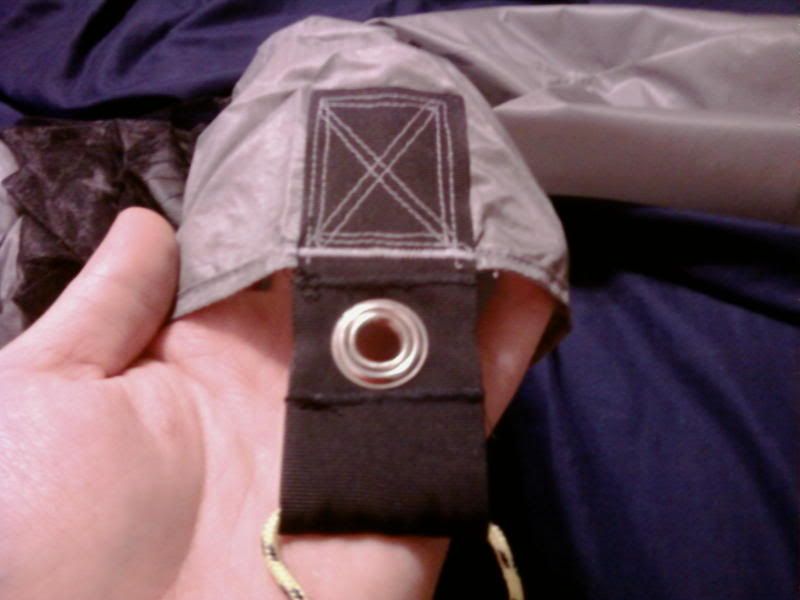
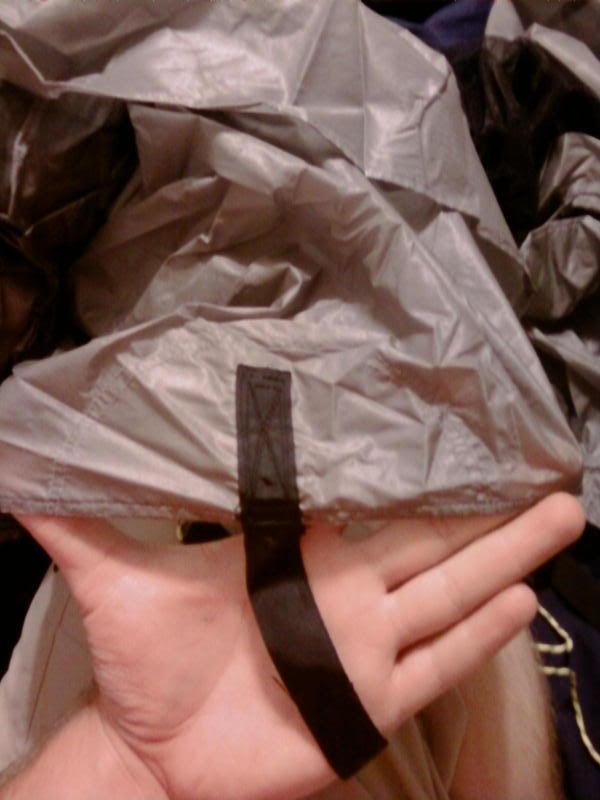
The side pulls aren't that complicated. The tent material is hemmed, the webbing is doubled over to form a loop and sandwiches the tent material. A bartack is sewn in to the webbing to hold it together, at the depth that it goes up onto the tent material as a stop, I forget the exact distance but I think an inch and a half. The webbing is sewn on to the tent material with another bar tack right at the edge of the tent material, and a double box x stitch. That is exactly what it sounds like, its two boxes, with two x's in the middle. In the double box x the "double" part of the box and the x are slightly offset from the first box and x. That is the same stitch all of the pulls use.
The mesh is much more simple. When the front/back walls are attached to the sidewalls, the top inch is left loose. That top part is folded over toward the outside of the tent. Two rows of stitches are used, about a quarter inch apart.
I can try to get pictures tomorrow, but i dont know how good the stitches will show up.
Posted by: james__12345
Re: Starting on my quest Bilgy tent - 09/11/11 11:13 PM
I remembered, I did grey thread on the foot end, to make it easier to tell the head end from the foot end when starting to set it up.
Corner pull (corner of tent material is folded to provide a straight area of material for the bartack that holds the gossgrain on)

Ridge pull
side pull
Posted by: bmadau
Re: Starting on my quest Bilgy tent - 09/12/11 02:51 PM
Thanks! that looks very similar to what I did on my tarp... I just winged it- I didn't see any sewing details or close up pics on how to attach them when I started my project.
BM
Posted by: Wolfman
Re: Starting on my quest Bilgy tent - 09/16/11 12:58 AM
Great Job on the tent and all the details James! I am going to have to try something this winter.
Wolfman
Posted by: james__12345
Re: Starting on my quest Bilgy tent - 09/17/11 09:38 PM
I finally got around to testing it out again with the silicone stripes on the outside of the floor. It was alot better than last time, but still had a bit of a sliding problem. I guess it just needs a thicker coat of silicone on the stripes.
I haven't hose tested it yet like I planned to, but I did get some rain last night, and I didnt see any sign of any leaks. It was just a light slow rain, but it rained for a while. Also had NO condensation at all this time. The seam at the peak of the footwall hasn't changed, so I dont think its going to try to spread any, so it seems no patch will be needed.
Posted by: ltwt
Re: Starting on my quest Bilgy tent - 09/21/11 12:57 PM
Awesome job! I'd love to know the completed weight.
Posted by: james__12345
Re: Starting on my quest Bilgy tent - 10/01/11 08:51 PM
Didnt get to put the extra silicone on the floor before my trip with my cousin, but we found a good flat spot for it, so we didnt have any problems. We did try it out here close to home before we left for Cherokee. Room wise, it's not that bad for two people. I wouldn't want to share the tent with a complete stranger, but its not the intimate experience that reviews of some of the other light weight two person tents seem to suggest.
We had a lot of condensation on the night we tested the tent. We kept the door and foot flap down, so ventilation shouldn't have been a problem, I'm not sure why it was so bad. The night we spent in Cherokee it rained most of the night, and on that night the inside of the tent stayed bone dry. I guess it just has to do with the dew points, which is something I should keep an eye on in the future to see where the breaking point is just out of curiosity.
One thing I would like to add is that I noticed there was MUCH!!!! less sag in the tent as a whole when using the side lifter poles. The sag isn't as big an issue if you're by your self, but it does cramp you up a bit when sitting up, especially if there is any condensation on the roof. I'm wanting to get out and check my sleeping bag at some cooler temps soon. While doing that I will experiement with using the side lifters in the way the new directions suggest, just tying them out to a stake further out from the tent than the side pull. When I get around to doing that I'll be sure to post what I find out for those like Wolfman that are interested in using this tent solo.
Posted by: jimmyjam
Re: Starting on my quest Bilgy tent - 10/25/11 03:54 PM
Nice job. I made the 2 person Bilgy last year and I really like it. It's a well thought out design with the clothes line, pockets, and the way you can velcro the floor to the roof for easy set up. I want to make the 1 person next for when my wife doesn't want to go backpacking.