Materials List
|
The Pattern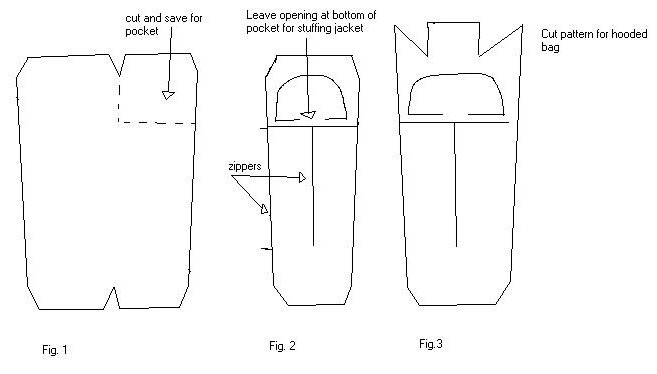
|
Instructions
A little twist I used when I made my bag was to sew the two pieces of fabric all the way around except for the top opening. After you cut the piece of fabric from the top piece at the hood, make a 36" cut right down the center of the top piece of fabric (Fig.2). This will give you a Feathered Friends Rock Wren configuration with the zipper in the front. I have found that when liner bags are used in mummy bags they are very cramping and hard to zip. This front zipper has made it much easier for me to zip up. When you sew the zipper in it is a good idea to make a bit of overlap on the zipper so the material covers the zipper. This will help with zipper drafts and it will keep the zipper from snagging the nylon liner of your sleeping bag. If you want a drawstring on your bag make a small hem across the front of the top piece of fabric but sew the string into the hem as you sew it. Sew the string at the end that will be in the hem. It is important to anchor this end very well so it won't fail in the backcountry. As you sew the hem make sure to not sew the string at any other point so it will stay free. Add a dray cord lock, tie a big knot on the end and you're set. If you make the front zip model you can do the above just twice on either side of the zipper. It is also easy to make the simple top of the bag a hooded bag by simply making a few extra cuts and seams (Fig.3).
|
Return to: [ Top ] [ Make Your Own Gear Page ]