Posted by: taM
My sub-2 ounce kitchen - 05/24/10 06:11 PM
I wanted to wait to make a thread on my new MYOG cook kit until I trail tested it. After a few days on the trail, having ridden nearly 60 miles in my pack, I figure it's passed the test, and I'd share.
The "stove" if you can call it that is an aluminum tea light container. I measured its' capacity at an absolute maximum of 17 ml of fuel, but that's only possible on a dead-level base. It will hold 15 mL (0.5 oz) without a problem, and without having to worry about it spilling. I generally only use about 14 mL for each burn, so it's got plenty of capacity.
The windscreen for the kit is homemade from roof flashing. It's a good deal more sturdy than necessary, but I'm ok with that. It's a caldera-cone type system that's 5" diameter at the base, and just wide enough around the top for the lip of the pot to sit for support. There's a decent youtube video regarding how to make your own cone, based upon the dimensions you want, and I used that as a basis for this.
The pot is the bottom 3/4 or so of a foster's can. After cutting the top off about .75" above the 2-cup level, I rolled a lip with my fingers and a pair of pliers to strengthen the top edge. The lip was rolled over on itself 3 times, so it's essentially 4 times the wall thickness. This added a really nice amount of strength to the pot.
The lid is simply the bottom of a pie-pan cut a little large, and formed to fit. It's probably the weakest link of this system, and would be too flimsy for a thru-hiker, but for week long trips or so, it's substantial enough. For as easy as it was to make, I don't mind replacing it periodically.
Below are a few pics. I didn't want to have to budget extra weight for a container to carry the cone, or the pot, as it defeated the purpose of the lightness in my mind. The solution was to wrap the windscreen/cone around the sack into which I stuff my extra open-cell foam torso pad (used to supplement my CCF sleep pad) No extra weight, less the piece of tape, and offers enough protection for the screen not to get bent up.
The scale is difficult to read, but it says 1.784, just over an ounce and three quarters. Paired with my styrofoam drinking cup that nests inside, it's just over 1.9 oz.
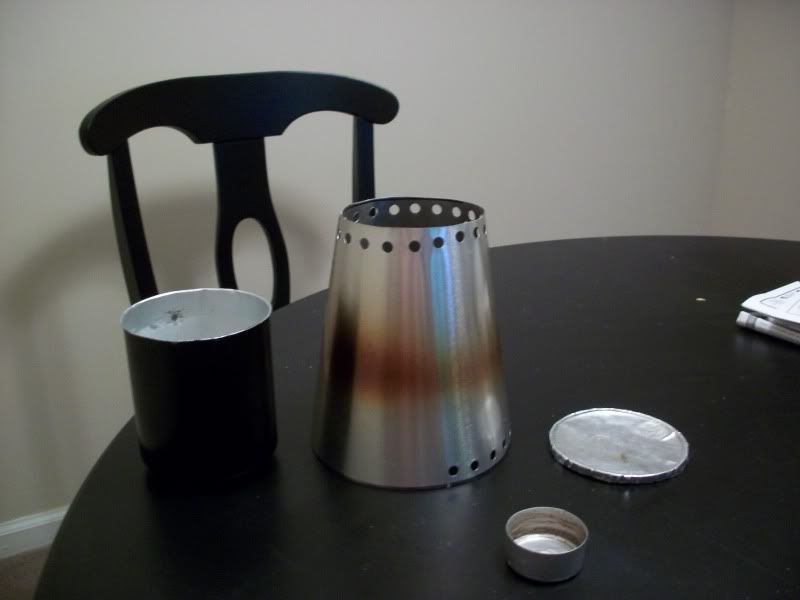
components
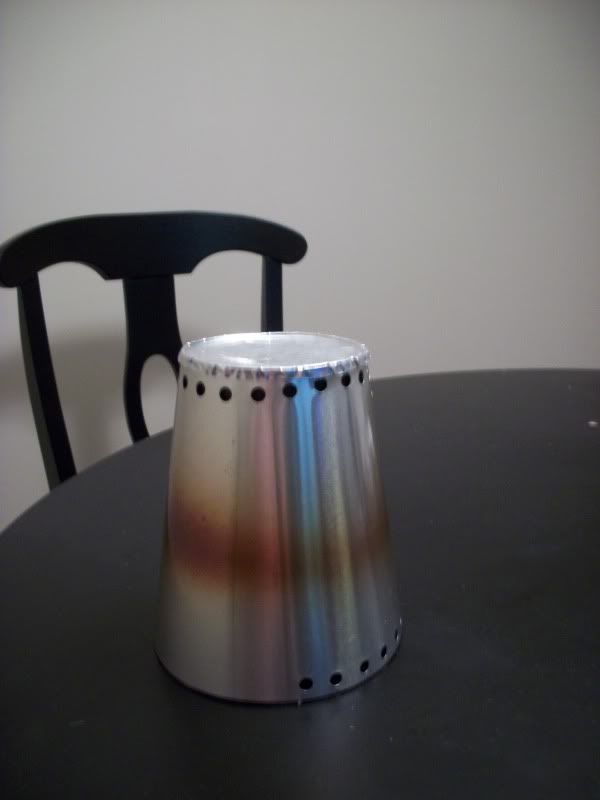
pot covered and sitting on the windscreen/support/cone
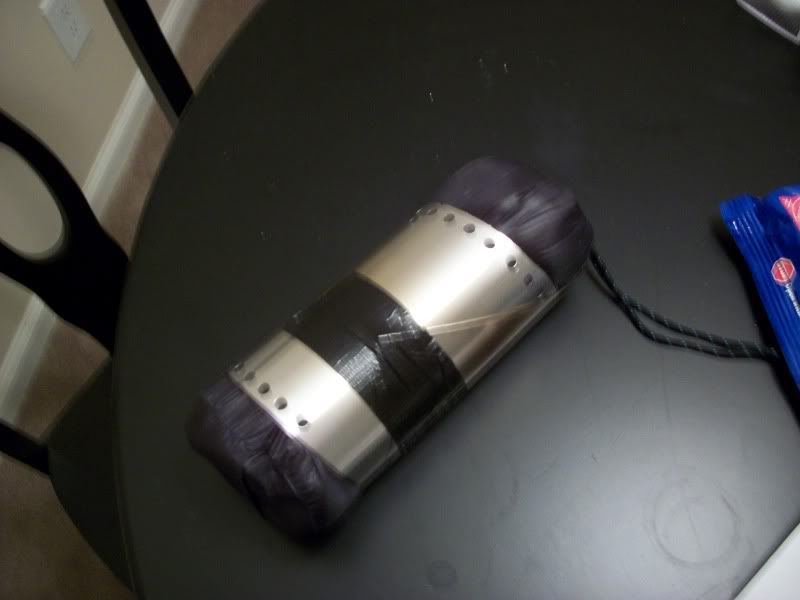
storage
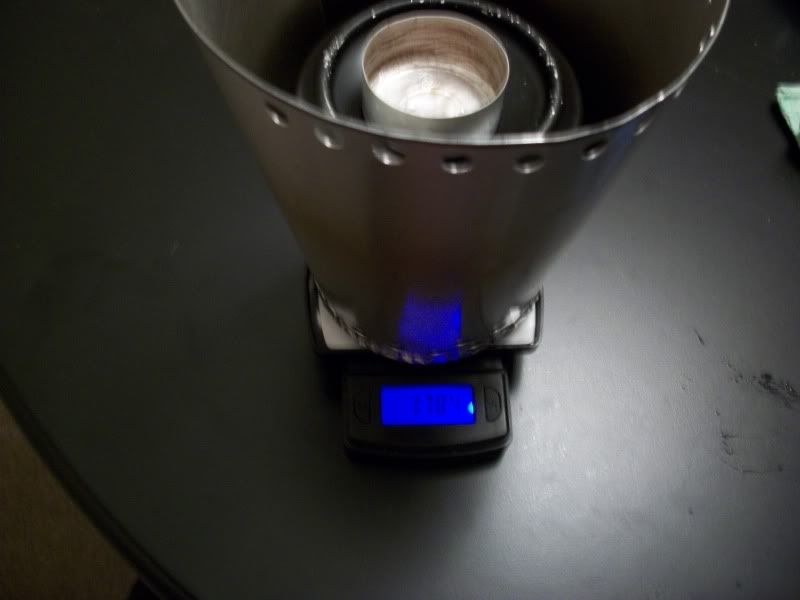
weigh-in
Lest anyone think that performance is compromised with such a setup, I've done a decent amount of testing with this kit, both in the kitchen, and in the field.
Fuel efficiency was a primary concern of mine, and boil times were of secondary importance. I've been able to consistently obtain 2-cup boil times of 8 to 8.5 minutes on 13 ml of fuel (under .5 oz). I usually boil 2 cups in the morning, and 2 more in the evening, so I budget 1 fl oz of fuel per day (0.78 oz by weight).
Fuel efficiency is slightly worse in windy conditions. In 20 mph winds, it required a fuel load of 15 ml, and a burn time of just over 10 minutes to boil 2 cups. A boil, and stove burn-out occurred nearly simultaneously. Where I hike, 20 mph winds with no protection are fairly rare, but I still think this performance is admirable.
There are certainly setups that are, to a degree, lighter. There are probably a few that are more fuel efficient, though I've not seen any. Many are more robust, and possibly a bit less finicky, but I feel I've obtained a great balance of all of those things, while being able to enjoy something I made myself!
So, let's hear everyone's thoughts...love it or hate it!

The "stove" if you can call it that is an aluminum tea light container. I measured its' capacity at an absolute maximum of 17 ml of fuel, but that's only possible on a dead-level base. It will hold 15 mL (0.5 oz) without a problem, and without having to worry about it spilling. I generally only use about 14 mL for each burn, so it's got plenty of capacity.
The windscreen for the kit is homemade from roof flashing. It's a good deal more sturdy than necessary, but I'm ok with that. It's a caldera-cone type system that's 5" diameter at the base, and just wide enough around the top for the lip of the pot to sit for support. There's a decent youtube video regarding how to make your own cone, based upon the dimensions you want, and I used that as a basis for this.
The pot is the bottom 3/4 or so of a foster's can. After cutting the top off about .75" above the 2-cup level, I rolled a lip with my fingers and a pair of pliers to strengthen the top edge. The lip was rolled over on itself 3 times, so it's essentially 4 times the wall thickness. This added a really nice amount of strength to the pot.
The lid is simply the bottom of a pie-pan cut a little large, and formed to fit. It's probably the weakest link of this system, and would be too flimsy for a thru-hiker, but for week long trips or so, it's substantial enough. For as easy as it was to make, I don't mind replacing it periodically.
Below are a few pics. I didn't want to have to budget extra weight for a container to carry the cone, or the pot, as it defeated the purpose of the lightness in my mind. The solution was to wrap the windscreen/cone around the sack into which I stuff my extra open-cell foam torso pad (used to supplement my CCF sleep pad) No extra weight, less the piece of tape, and offers enough protection for the screen not to get bent up.
The scale is difficult to read, but it says 1.784, just over an ounce and three quarters. Paired with my styrofoam drinking cup that nests inside, it's just over 1.9 oz.
components
pot covered and sitting on the windscreen/support/cone
storage
weigh-in
Lest anyone think that performance is compromised with such a setup, I've done a decent amount of testing with this kit, both in the kitchen, and in the field.
Fuel efficiency was a primary concern of mine, and boil times were of secondary importance. I've been able to consistently obtain 2-cup boil times of 8 to 8.5 minutes on 13 ml of fuel (under .5 oz). I usually boil 2 cups in the morning, and 2 more in the evening, so I budget 1 fl oz of fuel per day (0.78 oz by weight).
Fuel efficiency is slightly worse in windy conditions. In 20 mph winds, it required a fuel load of 15 ml, and a burn time of just over 10 minutes to boil 2 cups. A boil, and stove burn-out occurred nearly simultaneously. Where I hike, 20 mph winds with no protection are fairly rare, but I still think this performance is admirable.
There are certainly setups that are, to a degree, lighter. There are probably a few that are more fuel efficient, though I've not seen any. Many are more robust, and possibly a bit less finicky, but I feel I've obtained a great balance of all of those things, while being able to enjoy something I made myself!
So, let's hear everyone's thoughts...love it or hate it!